Course Layout - East
East Course -par 36  3297 m
  3066 m
  2802 m
  2464 m
Holes [1 & 2] [3 & 4] [5 & 6] [7 & 8] [ 9 ]
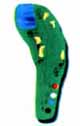
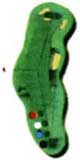
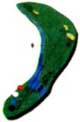
| HOLE 1 |
PAR 4 - Index 15 |
| 315 m 295 m 260 m 234 m |
click to enlarge |
 |
| A straightfoward opening hole, favouring a driver or 3-wood aimed towards the bunker on the right. A good tee shot will leave a short pitch to the putting surface, which stopes towards the lake that borders its left edge. |
|
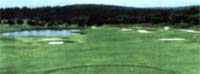
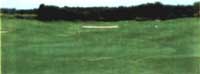
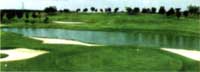
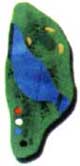
| HOLE 2 |
PAR 3 - Index 17 |
| 178 m 150 m 131 m 112 m |
click to enlarge |
 |
| This challenging par 3 plays slightly downhill, bordered by water on the left. From the back markers, most golfers will need a solid five or six iron to reach the right-left sloping green. Correct club selection is vital, especially if the pin is cut to the left of the putting surface which will bring both greenside bunkers directly into play. |
|
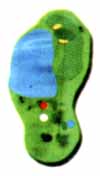
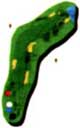
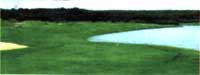
| HOLE 3 |
PAR 4 - Index 1 |
| 408 m 378 m 347 m 313 m |
click to enlarge |
 |
| A long par 4 that plays as a mid dogieg right with a generously wide landing area for the tee shot. Accuracy on the approach is imperative as the green is well trapped by deep bunkers to the front and back left. The putting surface slopes back towards the fairway. |
|
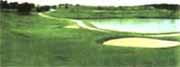
| HOLE 4 |
PAR 5 - Index 13 |
| 557 m 530 m 500m 448 m |
click to enlarge |
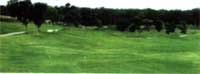 |
| This sweeping dogieg right is the longest hole on the course. The drive should favour the left side of the landing area, beyond the left fairway bunker and avoiding another trap further right. From there, a well struck second shot lay-up will leave a short pitch to the elevated green. |
|
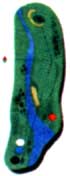
| HOLE 5 |
PAR 4 - Index 7 |
| 390 m 357 m 333 m 301 m |
click to enlarge |
 |
| Plays as a sharp dogieg left, trapped along its entire left edge by a lake. Target your tee shot to the right, using the right fairway bunkers as a visual aid. The approach has to be deftly played to avoid sand on the right, while staying well clear of the water on the left. |
|
| HOLE 6 |
PAR 4 - Index 9 |
| 354 m 335 m 307 m 274 m |
click to enlarge |
 |
| Water and sand combine in menacing fashion on this daunting par 4. From the back tees, a 150-metre carry over a lake and a bunker is needed to find the fairway, which slopes towards the lake on the left. The approach has to avoid a large, semicircular greenside bunker that starts from the front left edge and extends along the left to the back of the green. |
|
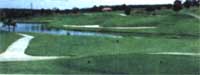
| HOLE 7 |
PAR 4 - Index 3 |
| 505 m 482 m 447 m 392 m |

click to enlarge |
 |
| This double dogieg right offers a generous landing area for the drive, despite the presence of a long bunker on the right. From here, two options are available - long hitters may attempt a daunting 200-metre odd water carry to attack the green in two, while more prudent types will lay up before the water that cuts across roughly 100 metres from the green |
|
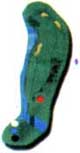
| HOLE 8 |
PAR 4 - Index 11 |
| 192 m 165 m 144 m 124 m |
click to enlarge |
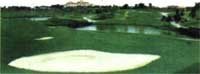 |
| From hillside tees, this pretty par 3 plays downhill over a pond to a broadish green. A solid mid to long iron will be needed to find the putting surface, as anything short may wind up rolling down into the water. The green slopes against play, which may keep overhits from rolling off. Take note of the wind when selecting your club. |
|
| HOLE 9 |
PAR 4 - Index 5 |
| 398 m 374 m 333 m 266 m |
click to enlarge |
 |
| A great finish to the East Course is furnished by this tough par 4, which plays over water to a split-level fairway bordered on the left by a lake. The ideal drive is to the centre of the right, higher level of the landing area, from where a clear approach opens up to the green. Note that the putting surface slopes significantly towards the water on the left. |
|
|
